my-car-computer.com


Fitting rear view cameras
 |
 |
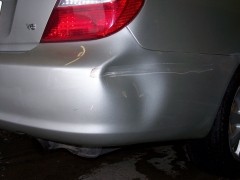
Fitting almost inevitably involves drilling holes in the bodywork of your vehicle. Some cars may already have holes in a convenient location as part of their design. If so, take advantage of this to allow fitting with a minimum of hole drilling. The camera is best positioned on the bumper or the tailgate, depending on the type of car.
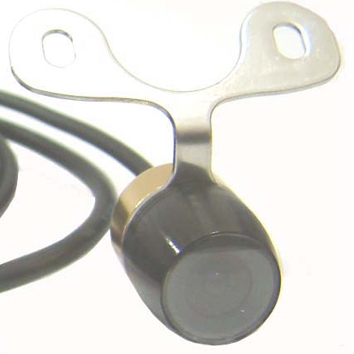
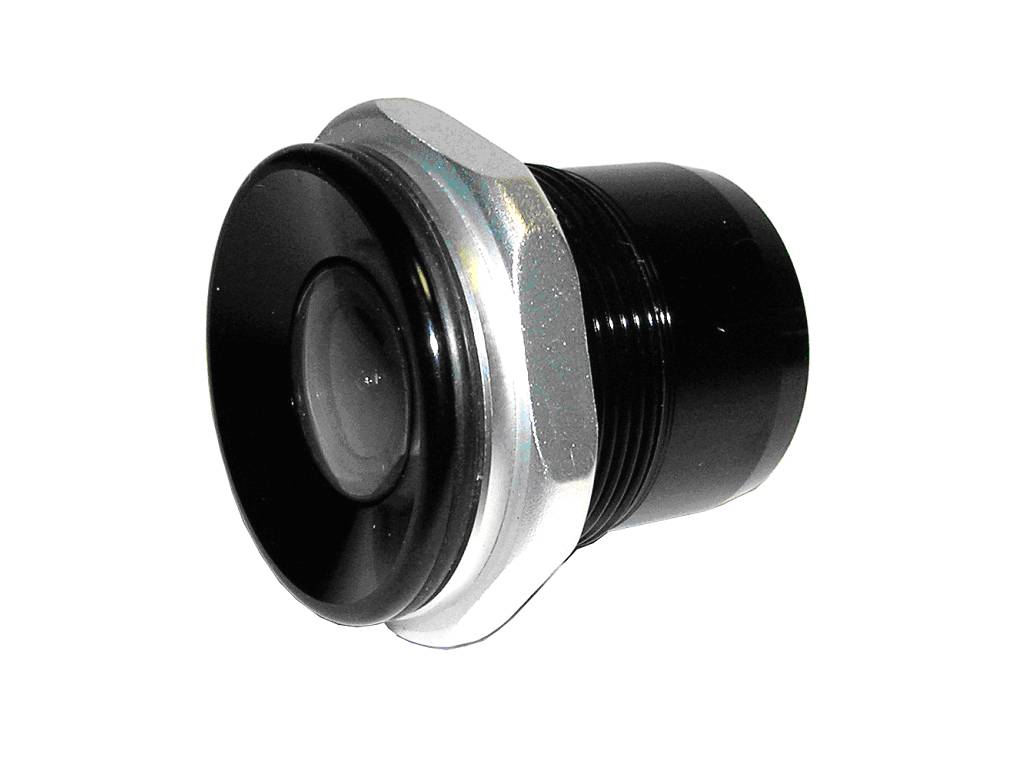
Make sure you choose the appropriate style of camera for the position in which it will be mounted. A camera such as the one shown in the right hand illustration above, is suitable for bumper (fender) mounting. It has a securing nut on the camera body, allowing it to be pushed into a hole in the bumper and clamped in position. The camera shown on the left, has a bracket which is more suitable for fitting to the tailgate.
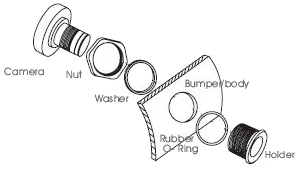
Choose a camera which will be as inconspicuous as possible. Go for a size and design which will protrude as little as possible from the body of the car. A typical fixture for a bumper camera is shown to the right.
Before tightening the Camera fixings, check the image it is producing to ensure it is not tilted. If necessary, rotate the body of the camera until the image is level, before securing in its final position.

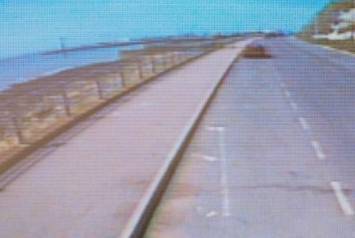
Camera orientation wrong Camera correctly aligned
Although a camera may be sold as waterproof, when washing the car using a pressure jet, it is advisable to avoid spraying water directly onto the camera. Mud or other debris will inevitably collect at some point. When cleaning this off, "gently" is the keyword. Avoid scratching the lens.
Wiring
These types of CCTV cameras are typically powered and controlled from a small circuit box positioned in the vicinity of the camera. As a rear view camera is normally only used when reversing, the power is drawn from the live terminal of the reversing lights at one of the rear light clusters. This means the camera is only "live" when reverse gear is engaged.
When the camera goes "live" and a signal is detected, the display screen automatically switches from the normal PC display to the view from the camera. Some cars now use a lower voltage to the rear lights or use a microprocessor to control their operation. In this case, you will need to consult the wiring diagram for the vehicle, or take some advice, to determine from where the live feed should be taken.
The positive (+ve) wire should be connected to the live feed. An in-line fuse should be incorporated in the +ve wire. The current used by a CCD device will typically be less than 100 mA, but check the specification of the camera, and remember to use a fuse which is the correct rating for the current drawn by the camera.
For safety reasons, always use a fuse. Never connect the camera directly to the car battery. The negative (-ve) wire should be connected to an earth point. Again, there will be one at the rear light cluster. Under no circumstances should you mix up the camera +ve and -ve leads. This runs a high risk of burning out the electronic circuitry.
The video signal cable runs from the small control box to the display screen. A typical arrangement is shown below.
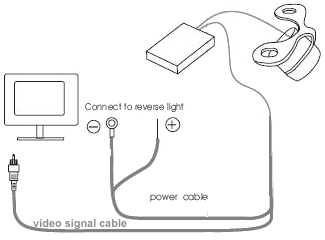
You can have the option of selecting the camera view without reverse gear being selected. By simply fitting a 2 way switch, you are able to toggle between always on, and only on when reverse gear is selected. You simply run 2 live wires to the switch, one as described previously from the reversing light, and one from another supply which is permanently live whilst the ignition is switched on.
You may need to make joints in the cables, outside a weatherproof area of the car body. In these circumstances, seal the connections with Self Amalgamating Tape. This will waterproof far more effectively than insulating tape.
The routing of the cable from the rear of the car to the display screen at the driving seat will be dependant upon the individual car. The cable should be hidden behind the carpet and/or trim. This may involve temporary removal of some seats. Refering to a good workshop manual will indicate the correct way to go about this.

Put safety first. Find out why fitting a reversing camera leads to safer driving.
Choose a rear view camera which is right for you.